Sunday, January 31, 2010

My Blog-centenniel

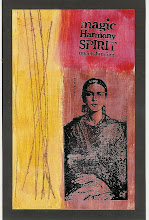
Self Portrait (art journal page)
This is my 100th blog post!  I thought I'd feature a self-portrait art journal page as the artwork for this somewhat introspective post.  I started this blog as part of Shimelle's Blogging for Scrapbookers class, and I'm so glad I did.  My goals were modest - to find a way to start organizing and cataloging my art. I feel like I've accomplished that, and so much more!
      First and foremost, thanks to all of you who have become regular followers and commenters.  I feel like I have new friends all over the United States, England, Northern Ireland and Australia. I never expected to find a new circle of virtual friends.  I love reading your blogs and learning more about your lives.
     I've also found my blog to be motivating.  You push me to be a better and more prolific artist. Thank-you!
     Finally, in addition to cataloging my artwork, I have found this blog to be an invaluable resource for cataloging my thoughts about my art and life as an artist.  Thank you for engaging in discussions about style and process and everything else.


I looked back over my 100 posts, and it was very interesting!  I started with a rooster and some organic art to help  explain the title of my blog.  You've seen a lot of my collage art, cardss and scrapbook pages, Tim tags, Christmas projects and photos.  I've fallen into a happy pattern of trying to post a scrapbook page, a photo and a card once a week and then filling out the rest of the week with mixed media art. I really like doing tutorials and give-aways but not necessarily on a scheduled basis.  And here our my ten favorite posts out of the first 100:
"The Butterfly Seller"  Probably my most popular art journal page.
"Using Your Photographs in Your Art" This really helped me organize my thoughts, especially the a-ha movement I had of using my photos as inspiration for other art pieces.
"New Year's Day Card Recipe" A fun tutorial with so many wonderful participants.
"I Love This Photo" This helped me realize that my blog can be a place to share photographs as art.
"The Creative Circle Blog Party" This is where I feel like I really got to know so many of you, and I had fun with all our projects.
"Cherish Your Heritage" One of my favorite mixed media pieces and the post draws together thoughts about the creative process.
"It's all about the light"  A catalog of photography tips, generated by you all, that is incredibly helpful.
"What do you plan for it?" The first in the series.  Has two of my favorite mixed media pieces and my living room.  This is a reminder to do another post along these lines soon.
"October Class Review"  I like doing these - it helps me figure out what works and doesn't work for me in classes.  I'll need to get working on my January Class Review soon.
"Never Forget Those Who Served" One of my favorite scrapbooking posts.  Not for the layout, which is old and somewhat uninspired but because of the revised journaling which I was really only to do because I blog.
If you started or refreshed your blog as part of Shimelle's Class, you must be at about 100 posts, too.  What are your thoughts on your blog?


Saturday, January 30, 2010

Photography a la Frida Kahlo

I've decided to follow along with the "Develop on Fridays" photography course, even though I haven't officially signed up for the forum or class.  I'm also starting at assignment #2, but I might go back and do #1 later.  Assignment #2 "influences" was to find an artist who calls to you, figure out why he or she speaks to you and then take a photograph that incorporates those ideals.  I chose Frida Kahlo who has long been one of my favorites.  Her paintings (often self-portraits) were intimate looks at her struggles in life. She made the personal political and vice-versa.  She used bold colors and Mexican motifs.  My photograph is also about how the personal can become political and takes a stand on the same-sex marriage debate.  It's called "I favor love." It features a vintage glass heart and some amazing "marriage milagros" from Peru that I found when I was out thrifting today.  I hope you like it, and I hope I don't offend you.

Friday, January 29, 2010

Things I Do/Things I Don't Do (finding your style)

I really like Karen's blog Random Reflections because it has such a nice variety of thoughtful posts, inspiring cards and nice photographs.  Recently, she posted a link to a new-to-me blog called "Develop on Fridays," which seems to be about finding your personal style.  This is a topic that continues to fascinate me.  The Develop on Fridays blog had lots of interesting information, including a link to this article.  One of the things the article and blog post mentioned was to decide which art forms, techniques and media you embrace and which you have decided simply aren't for you.  I think this is a very useful project, so here are my current thoughts.

Things I embrace in my art:

acrylic paint                             radiant pearls
pastels                                     twinkling H20's
alcohol ink                               stencils
plaster                                      paper
rubber stamps                          ink
my photography                       texture mediums

Things that simply aren't for me:
sew, knit, stitch or crochet                         soldering
watercolor                                                 fabric
sizzix, cricut, etc.                                       copics, markers or colored pencils
digital scrapping, digital art journaling, etc.

Let me make clear that I admire the work and the look of a lot of the things on the second list.  I really would like to be a knitter or learn how to use the computer for art, but it's just beyond me!  I love and admire the look of beautifully colored images with copics, but I don't have the patience for it.  I'm not sure why I do have the patience for coloring with radiant pearls or twinks, but somehow I do.  How about you? What do you do?  What don't you do?  It's Friday, I think I'll go check out "Develop on Friday."

Thursday, January 28, 2010

Project 1440: Capture the Moment

Do you realize there are only 1440 minutes in each day?  What if you were to take a picture of each minute in one day and record it for posterity? You could create an album with them and post to flickr!  Check out this blog for more ideas . . .
Okay, I'm just being silly and poking a little fun at Project 365 and all the other opportunities out there to record our lives in searing detail.  There is no such thing as Project 1440, is there?  Underneath the sarcasm, I actually like the process of recording the everyday and have done two albums in that vein. 
March Madness -
For this project, I took a picture a day for a month.  I did it in March, 2007, and it remains one of my all time favorite scrapping projects.  I used a format for an album that Shimelle featured on her blog here (the blog post links to a great broadcast on Fiskar's TV).  Each page has the picture, a ribbon, a strip of patterned paper, an embellishment, the date and some journaling. It went together super-quick and all coordinates because I cut all the paper, ribbon, and embellishments before I started.
I love how the album really captures our house, kids' and activities at a particular moment in time.  I also think it will be cool to look back at things like my cell phone, calendar and keys in twenty years.


Week in My Life:
This is a project where I took a bunch of pictures every day for one week and then put them all together in an album.  Ali Edwards does this every year or so on her blog and that was my inspiration. You can read about her project here. I chose a week in Fall, 2008.  In interspersed daily pages with theme pages.  In the photo below, you can see the title page, a theme double-page spread (mornings), a daily double-page spread (Tuesday), and the end page (self-portraits).  Again, I like looking back at this, although the theme pages speak to me more than the daily pages.

I didn't do anything like this in 2009 and wish I had.  This year I'm going to do a monthly layout in our regular albums that have random shots, and I also want to do another mini album of either a week or a month.  The idea of  "Ten photos on the Tenth" of each month (or something similar) also appealed to me.   Have you undertaken any of these projects?  Do you think you'll stick with them?

Wednesday, January 27, 2010

Inchies & Twinchies & Blogs with Prizes


I love winning prizes!  Recently, I found a wonderful new blog that runs lots of contests with very cool prizes.  It's called Sunflowers and Dragonflies, and a recent challenge was to incorporate  inchies or twinchies into a project.  Inchies are little 1x1 pieces of artwork, and twinchies are 2x2 pieces of artwork.  I made a set of twinchies, using photos I took at an exhibit at the Academy of Sciences on human facial features, a masked and spray-inked background, and painted grungeboard.  You can see the full set of twinchies here.  I used one of the twinchies on this art journal page with a messy, collagey, spray ink and torn paper background.


Here's a card I made with some inchies.  These were very simple to make, but I think they turned out great.  I cut grungeboard into 1x1 inch squares, inked up a collage stamp (Stampers Anonymous) with water-proof ink, and then pressed the square onto an interesting portion of the stamp.  I colored the image with radiant pearls and a water brush.  They were so easy that I actually did them while supervising homework!

Want some more ideas for inchies and twinchies?  Check out this old post from Mel's blog during the Creative Circle blog hop.  Want someplace to win cool, non-crafting prizes?  Check out my friend Sonja's blog called hello beauty!  She always has fantastic give-aways and interesting beauty advice!

Tuesday, January 26, 2010

Luna Vintage Rowhouses


I'm in a swap at the Paper Artists Online Forum where we're making altered house fronts. I'm calling my project the "Luna Vintage Rowhouses" because each house will incorporate a vintage photo from the Luna side of my family, vintage sheet music and other vintage ephemera.  Here's the two that I made.  I sent out bags full of the raw ingredients to my swap mates, and they will use the raw materials to complete my set.  Meanwhile, I will be happily working on theirs.  Should be a great swap! That's my mom, by the way, on the taller house.  She must have been about 16 at the time - wasn't she gorgeous!
 I got some inspiration for my houses at a challenge blog called "Something Completely Different," which Mel of the wonderful I Speak Melsh blog turned me onto. Each month they choose a challenge theme and give a new variation each week. Their January theme is arches, and the first two themes were "New Year" (thus the 2010 on the butterfly house) and "Fashion," (I think my mom qualifies).

  The third challenge of the year was arches and angels, so I made one more row house as a thank-you for the swap hostess.  I hope she'll like it!

Monday, January 25, 2010

Photo Cards


I love using my photos to make cards.  For these cards, I use actual photos, not copied images because the photo quality needs to be really high.  I've actually taught this as part of a class, so pulled out my notes to find these pointers:


Size. I usually start with 4x6 or 3.5x5 photos and make standard size (4.25 x 5.5) cards.  This dimension usually requires cropping the 4x6 photo, so I will sometimes make larger (5x7) cards if I have a 4x6 photo that I don’t want to crop. 


Types of photos.  I have found that photos or architectural elements (doors, windows, flower boxes, statues, etc.), landscapes, flowers, and interesting street scenes all lend themselves well to photo cards.


Construction. I like to mat the photo with a thin mat on solid cardstock and then use patterned paper for the card itself.  


Greetings and Sentiments.
1. When looking at photos, some have images which fill the entire frame, while others have a lot of negative space (open sky or a plain wall).  Those with negative space are naturals for allowing you to add a greeting, quote or sentiment. Notice that “negative space” does not have to be completely empty space - it can be grass or meaningless foliage.   In the cards on top of this post, a house in the background and a wall served as the "negative space."
2. Sentiments can be stamped directly onto photos using stayz-on ink or can be stamped onto vellum, cardstock or tags and then placed onto the photo/card with vellum tape, adhesive, brads, eyelets, etc.
3.  I find that photo cards work particularly well for sympathy, thinking of you, just saying hi and birthdays.  I used up a bunch of "extra" pumpkin patch pictures one year to make birthday cards for fall birthdays, for instance.  
4.  Consider witty, funny or ironic greetings as well.  This is a terrific opportunity to use all those quote stamps you just had to buy!  Remember this photo:

I've been considering all kinds of greetings to use with it.  It could be something funny like, "What if the hokey pokey really is what it's all about?" or "I hate it when that happens." (yes, I have stamps with those sayings).  Or it could be something along the lines of "Missing you."  Which do you think would be better?
4.  Blank cards (without a sentiment) work well with very strong photos or those which have a strong sentiment inside.  I have used the flower photo above as a blank card (without a sentiment) many times.


Final Assignment:  Look at this photo and come up with an appropriate greeting (either inside or outside).  Bonus point if you actually have a stamp with that saying. Double bonus points if you can make it something Valentine-related.  Go!